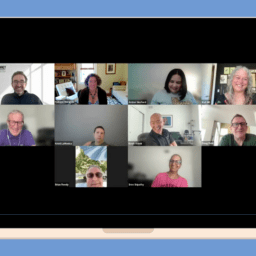
During our monthly dose of joy in August, we made envelope books with tags and a signature. Watch the video below to follow along. And, if you aren’t already registered for our monthly joy break, be sure to register today to be notified of all upcoming sessions and receive the recordings straight to your inbox.
To download the audio, click here.
Read the transcript below or click here to download.
Lorraine Wilson (Ambassador, Davis Phinney Foundation):
You know, guys, usually I try a little drawing warm up, but today we are really going to need every moment and we’re going to need our hands working in good condition. I don’t know about you, some mornings I’m on, some mornings I’m not so on. But you know, those things they have us do in the doctor’s office? Yeah. We’re going to do those for practice and warm up. So, we’re just actually open and close our hands. Just kind of, we’re going to need our hands today. So, we just want to like, get them going. Faster, shorter, really stretch them. That does feel good for me. I hope it feels good for you. Then, you know when they want you to flip flop your hands, yeah, and they want you to do it fast and smooth. So, you know, I practice this, the UPDRS and me, you know, I’m going to win as long as I can.
So that always feels good too. And piano fingers, right? Yeah. I played piano. I haven’t tried lately, but a week ago I bought a ukulele. So, I’m going to warm up my fingers with ukulele someday, I hope. Okay. And then finger stretches. You can use your whole hand and just never stretch past pain. Hopefully you’re not even stretching to pain, but just to get a nice, smooth stretch, then you can take one finger at a time. Don’t overstretch the one finger at a time. I don’t want anybody hurting themselves. Get your thumb, get the other fingers. This is so important for me. I don’t know about you, but my hands want to do this a lot. I don’t like that. So, I keep telling my hands, oh no, we’re going to be good. We’re going to open up. And then just whatever makes you feel good to kind of get those hands ready.
That’s the short sweet, warm up we’re going to do. And I do recommend doing that daily to keep those hands behaving. Let me show you before I switch to camera view, if you were here a couple months ago, we did the envelope book. Now it can be called an envelope book, but it’s also part accordion. So, I call it a hybrid if you will, but this is an envelope book, and you’ll see it on the camera as well. But the idea is that when you open it, then each tag fits in these little pockets. Now these are pre-made tags with some little ribbons I added. I’m going to show you that again, close up as the need be in a moment, but let me show you the envelope book with signature. What is a signature? A signature is a group of pages that they assemble signature by signature by signature to make a bigger book because you can’t just fold a hundred pages like this and the ends are not smooth, right?
So here is an envelope book, but the signature, as you can see, are these pages we’re going to put in here. When we get to the camera view, you’ll see more. Let me actually go ahead and switch to camera view. And if this doesn’t, if it hasn’t stayed on, we’ll go back and make it behave. But you know, we’ll, it stayed! I love that. That’s like a miracle Angelina. That’s a first, you must be good luck for me.
Angelina Arrington (Senior Program Manager – Content and Curriculum, Davis Phinney Foundation):
Yay!
Lorraine Wilson:
Yeah. So, here close up is that envelope book and whoops, backwards. So, sorry, here you can see that each tag I have learned from yesterday, I left the back blank. Sometimes you can write on both sides if you so choose. The second one says, so it’s got, “learn from yesterday, live for today, hope for tomorrow, never give up. And this is a little bit of a map. So, I thought, yeah, we’ll need a map for life. And I think never give up is a good key.
And then the one with signature simply has, now this one, I did both sides. So now, “the everyday joy of artful lettering,” there’s side number one, in case, you know, the person opening doesn’t know. A mini journal, the arrow points in the right direction. Okay. So, “seek joy, choose joy,” right? Can you tell I like joy? “Be joyful from the inside out” and there’s just, you know, a little fun flower, little sketch, be true, and then “embrace the joy that’s calling you” and “authentic, grateful, brave, ready, set, go.” And then it says, “your mini journal is a turn away.” And so here is what I did with the signature. “This is your mini journal. Write, doodle, sketch, plan, create your own lettering style, enjoy.”
And then they have these pages. So, they could sketch on that if they so choose. Do you like my finger? Yeah, that was me versus a GMC truck tailgate, one part, one round of that. So that’s where we’re going today. So, we’re going to get our papers ready. And by the way, if you don’t want to really make the envelope book, maybe you’re taking notes or maybe you’re just watching, feel free to be coloring, sketching, anything you want to do while we’re working if this is not your thing. So personally, I like 12 by 12 scrapbook paper. 9-by-12 is hard to get any other way. If you’re using paper out of a printer, it’s 8 ½-by-11, and I can help you with that. You can just make a two-by-two-inch book. This is going to be a three-by-three-inch book.
So, I’m going to use my little handy dandy paper cutter. If you don’t have a paper cutter, then watch this. No paper cutter? No problem. Just measure nine inches, because it’s already 12 by 12. So, mention nine inches in the middle measure, nine inches at the bottom, nine inches, draw your line and then cut it with scissors. Right? You can do that. I’m using the paper cutter. So that’s maybe cheating. But all I have to do is line this up and look at that, 9-by-12. We’ll fold it shortly, but that’s just the only cut you need to make on the 9-by-12. If you are using regular 8 ½-by-11, the ratio of these is three to four. So, for a two-by-two, you’re going to cut your paper six-by-eight, I believe.
Okay. So let me move this out way. Now, tags, maybe you bought some white tags or have them, maybe you have a package of preprinted text that you’re just decorating. I don’t know, but we are going to talk about, just because we’re going to say we’re working from scratch, how to just make our own and varieties that we can do. So let me get my paper cutter back again. You can be using ruler, pencil, et cetera, but I know I want my tags to be about, if my book is three by three, I just need my tags to be a little bit narrower. And I like two and a half or two and five eighths. And I like them to be four inches tall, sometimes three and a half inches tall looks better. Just kind depends on what I want at the moment, but this I’ve already precut to four, a smidge over four.
So, I’m now going to cut them to two and five eighths. So, I could go between, I’m just going to cut one, but you keep cutting. You have four, because I’m going to show you while you’re cutting some of the variations. You, actually, let me go ahead and cut two or three so I can show you the variations. Now I use a thicker paper if it’s available for the tags, because I want them to be sturdy enough. If I just use regular paper, you can see that it’s not quite as sturdy and that’s okay too. Sometimes I glue it together to have a thicker paper.
Okay, so, what can we do with these plain tags? Well, option number one is to use your scissors and your whole punch and I kind of eyeball it. You can measure. If you’re a measuring person, that’s wonderful. I’m going to give myself a whole punch because I do want ribbon. Now watch this. If you don’t want to be punching holes and messing with ribbon, you can also just take a little piece of ribbon, and I like these small staples or little, smaller, unusual, and I just do an X and staple it on. That’s just handy, dandy quick. And I don’t think it looks too bad. Plus, you can get colored staples if you so choose. And so there you see, I’ve cut the two corners, stapled on the ribbon, that is extremely quick and lovely, simple to do. And by the way, if you think you’re giving this to someone that might look at it more than once or twice, these low holes reinforcement are good for the top hole.
Don’t forget about those, but let’s say for now I want to do a rounded corner. Now again, I’ve got a tool for that. If you don’t have a tool, you can draw around a corner and cut it out, but you can see this one is lovely. It’s just a little hole corner punch, not too expensive, you know, at the store, Amazon, whatever works for you. So, then I get those fun, nice, smooth corners. Okay, so, I’ve got smooth corners, I’ve got rounded, cut, et cetera. And another thing you can do that’s fun, I think, I’m going to measure this slightly. So, I’m going to say this is the middle and go right about it. So here, what I’m going to do is actually decorate the bottom. I’m going to go from this corner to there, this corner to there.
I’ll probably go ahead and cut off those corners. Oh, and if you want those to match, excuse me, the bumping down, I’m sorry. All you have to do is then turn it over and cut from that side. That way you’ll have them match. All sorts of little tricks. And then again, I could staple a ribbon, or I could find my center, add a hole punch and FYI, if you want this neat side of the ribbon on the front, if you’re having a front and a back, always insert your ribbon from the front. This is what I consider the not so neat side. And I consider that the back. So, if I was doing this with this ribbon and this is I’m calling it the front, maybe that’s where I’ve written my decoration. I just start here, put this through.
Like I said today, my hands aren’t being the friendliest. And of course, this is a thin at ribbon, but that’s much easier, but you can see then I get the neat side and really, it’s kind of like a men’s tie upside down. That’s correct. Yeah, fun. So, we’re going to need four tags. And again, you can write on one side or both sides. So, you can have four messages or eight messages, whether you buy premade, preprinted, et cetera. So that’s paper tags. And then the signature.
The signature, we need a piece of 8 ½-by-11 paper. I’m going to take this one. Now, accordion books have what we call peaks and valleys. So, if I said it like this, you could tell, you Colorado people get this, Washington, people that have mountains. Where I live in Texas is pretty flat, but there’s my peak. There’s my valley. Right? And if this is the front of the book, pocket one, pocket two, pocket three, pocket four. And of course, upside down, you can tell why they call it envelope books. That looks like your envelope that you would seal. So, it’s not the front that I’m going to put the signature, it’s the back. And so, it’s going to go right in here. On this one, you can see clearly that I changed where my bobbin was white so it wouldn’t show too much if you’re sewing, but I didn’t mind at all if this showed. And so, I used a coat, okay? We are actually going to use needle and thread, didn’t know that people would or would not have sewing machines. And so, we’re going to put our signature right in there. So, the easiest way is actually pulling this paper in there. Okay. You’re going to cut that whether it’s with scissors or your paper cutter, I think I’ll use my paper cutter to do it, using my tools.
And if you haven’t been on YouTube lately, trust me, you can find envelope books of all varieties. You can find so much. That’s actually I’m, I just learned from a lot of other wonderful people on YouTube, yeah. Okay. So, from this sheet, well, I didn’t cut it quite after that. That’s OK. Lay this down. And what I want is to make sure that I’m not wider and I’m not. So, see if there’s the edge, there’s the edge. I think you can see that. So that’s good. Now what about height? Again, I’m going to just use my pencil on it. You can use a ruler if you want to, but I’m just going to mark right there. And then this is going to be my sample for my pattern. So now that I know this will fit, I’m going to cut my other pieces to the same size. I usually just cut up this whole sheet and that usually gives me six or eight, I think six of these little sheets. So, you are cutting yours, mine, mark it with a pencil, see here?
Now, some people like that ragged edge, you know, like some of the antique books? So, it is fun also to tear these. And if you want to tear, feel free. And I don’t know if you know this they actually make, let me get this out. This is cheating perhaps, but if you want a nice or a cool looking edge, they actually make rulers that are not for measurement, although yeah, but they are to give you a cool edge so I can show you on this. Let me just tear this, just for fun. So, you have a rougher edge and a finer edge. I’m going to go with the finer edge. And when you tear, you get that cool edge. They also make what they call deckled scissors. Mine died, or I showed you, but they’re not good anymore. I guess I used them too much. So, I’m just going to cut three of these for our sample. But you should be able to get six out of that paper and you can use eight successfully. I’ve never used more than eight, but hey, you could try it for us.
Now, if you’ve never bought one of these paper cutters and you’re thinking, well, that’s kind of nifty. I like these paper crafts, destroyed creativity is kind of fun. I do like this paper cutter. It’s not like I’m going to recommend or say you have to get this one. That’s not my place at all, but I’ve used several over the years and what I like about this one, and I doubt you can, I don’t know if you can see this. Yeah, you can. Let me get my pencil. Right in the middle of the cut slot is a wire. Listen, can you hear that? That sounds like a bad ribbon. I mean, bad string on a violin, that ribbon helps me, or that little wire, helps me always cut straight. Like I can always tell I am in the right place. So then when you have your papers, all you’re going to do is fold them in half.
Okay. And we, that would be a signature. Now you have more papers. I give you a couple minutes while I taught when I’m making mine today, I went ahead, and I have not tried this before. So, I wanted to try this. I’m going to use black paper and then I’m doing everything black and white today for the one I’m making for someone. And again, envelope book, you can see when these are folded in just a moment, that’s where they get that name, accordion book, from this, and then signatures are just what they call these page inserts. Yeah. You can really see them in antique books. They’re so cool. Yeah. So, we’ll get ready for that. So, you keep working on your paper. Hopefully you have your 9-by-12 cut but let me cut another one if you’re making a two-by-two-inch book, just so I might help those people as well.
So, if I go six, and I don’t have to use a pencil mark on this, there’s actually an extension on the cutter. And so, I can get my measurements up here. It becomes a little awkward with my phone camera, that’s why I’m not doing that. Oh. And if you have not yet bought a metal ruler and you actually do very much of this, well, I highly recommend a metal ruler. There! So, this would be a small book. Well, let’s say two-by-two book and this will be a three-by-three-inch book. Okay. We’re doing great. We’re actually a little bit ahead of what I thought now. Now, chat or talk, if you need to come off mute, what do we have? That might help anybody. Let me look at this. Ooh, Austin, Texas. That’s right close to me. I’m in Abilene. I say close. This is Texas. What can I say? It’s like four and half hours away.
All right. It looks like with the chat, we’re doing good. So, at this point, we’re actually, before we get to work, we’re going to look at our joy break jar because you know, we really are about joy and I do love creative joy, but let’s see what this joy is. Oh, let’s see. Well, this one’s kind of obvious. Draw a quick sketch. Well, we’re going to kind be doing that with our tags. When we write in sketch, I did accidentally get two. They were hooked together. You don’t like that. It’s a “twofer”. Ooh, write a haiku. Now, that may not appeal to you. It may, I’ve got a whole jar full of stuff. You can make your own joy break jar, put in things you like to do. And the day, least once a day, take a joy break. Quick sketch, haiku. Let’s talk about haiku. Anybody here haiku? I love haiku.
Here we go. We’re going to use this piece of paper. If you don’t know. Okay. So, we’re going with the joy of haiku. How’s that? Five syllables, seven syllables, five syllables. That is a haiku. There may be more official something to it, but I don’t, I’m not aware of, but that’s how simple I keep it. Let’s see, I’m looking at the window. I don’t know what you’re looking at. On my windowsill, I have sing for joy, choose joy, and arms outstretched in joy. I have a lot of joy in my room, joy reminders. I need joy reminders. And so, I think instead of writing about joy, per se, I’m going to look out the window and luckily here, I do see sunshine.
I see trees. One tree is my neighbor’s tree and it’s not my favorite tree because he drops all of his oak leaves in the fall, into my pool. Why did you put that tree there? But it’s okay, it’s a joyful tree, right? I see a roof, no not the roof, I see a door there, there’s not a cloud in the sky. It’s probably already 90 or hundred here. All right. So, haiku, five syllables. Sometimes I do this. Okay. So, it’s not words, its syllables. I’m going to go with, “lovely sun to see,” and these don’t have to rhyme. They may be a continuing a thought or a sentence. “Green oak leaves” Ooh, “bend with the wind.” It is a very windy day. Oh, I like that.
“Lovely sun to see, green oak leaves bend with the wind. Thoughts of joy within.” There’s a haiku! I like it! I shouldn’t say that. You may not like it. I like it. It’s okay. Now maybe you want to do a quick sketch. Wait, let’s look at one more. What’s one more, we’ll just glance. Oh, this is a big one. Well, it’s not a big, it’s just long. Color in a coloring book! Some of you may like that! So, you can put things in your joy jar that you like. So, there’s a little joy break for our moments together. I don’t know what you’re seeing. Maybe you’ll type in your chat, your haiku, or maybe we’ll have time at the end where we can have you read a haiku. That’ll be fun. Folding! Are we ready? We’re going to be folding. Angelina, I’m ahead. I’m so excited. All right, friends, you may have paper that is white on one side and printed on the other. You may have paper that is printed on both sides. It’s all good. Here’s what I need you to mark first. Okay. I need, oops. That’s centimeters. Oh, some of you are centimeters. I need to give you these centimeters. Nine inches is, oh, it starts down there. That’s not helpful. Centimeters. Well, here I’ll do it this way. Measure. 23, just a smidge under, maybe I cut it wrong. 23 centimeters is nine. You people that know centimeters are laughing at me. That’s okay. I’m just trying. 30, 23 by 30 centimeters, which meant your tags could be around six and a half-ish almost centimeters, five, nine and a half-ish.
So, how do we fold? Going back to inches? We’ll get your centimeters in a moment if you need them. So, nine inches across, correct. Go in thirds, three, six. So those of you with centimeters, it’s going to be seven and a half-ish and 15 and a quarter-ish, just fold in thirds, you’ll do great. So, I like to just get this marked in two or three places. Now, if you are, maybe visually, these are harder for you to see maybe, you’re welcome to just draw those lines instead of folding them, without having a visual, besides those little marks. And what we’re going to do is fold in first. Now I need it where I can see that line. So, I’m going to actually fold it inside out first. Line up your tops here, crease well. And then watch this. We’re going to crease it really well. You can use your fingernail. You can use a stick, you can use your scissor and then if you would, turn it other way, fold it again.
Nice, good, crease both sides. Excellent. Then if you want, I guess we could have just not done if you wanted, now to go ahead and fold this third. And what you don’t want to do is to bring that paper into that fold. You want to keep it a nice clean fold. It may not be perfect, but it, I mean, that’s close enough. Close enough actually works on this, sometimes we like that. Anybody who’s a perfectionist or a recovering perfectionist, listen to my words, close enough. It’s good enough in this project. I, myself, am a recovering perfectionist, I can actually be kind of messy now, didn’t do very well with messy. So, you’ll have two thirds, and I am going to erase that because I really don’t want that line to show up.
So now we have two folds, and the next folds are even more fun. All you have to do is still bad side, inside up, is take the short end and take it to the other short end. So, those of you who are here a month or two ago, two months, literally, you’ve done this once. Oh, and by the way, did you see that paper just crinkle right there? See that little white bit? That tells me I just went against the grain. Did you know that paper has grain? Just like fabric has grain, but in these little books, it’s not, it’s okay. Now when I make journals or other things, it’s really important that I go with the grain. It makes a really big dent and I don’t want to do that.
So now I have a middle seam here, two long seams here. I’m going to take my short end again, and I’m going to fold it right to the middle, short, to short, middle, and crease. And maybe because this paper’s just old, that’s why it’s doing that to me. I started making scrapbooks eons ago and some of these are old pieces of scrapbook paper. Now, can you see that bitty white in that seam? I actually want that. Otherwise, the fold later is going to be too tight. We’ll keep that down there. There we go. I need a name on these. One of these two, it’s just fun. And I like boards. A neighbor came over on Sunday afternoon and we were, I was practicing with her to check my timing. Well, we talked too much. So, we took an hour and a half, and I told I only had an hour. But she was laughing at my tools. She said, “Lorraine, you’ve got everything!” And I don’t know about everything, but I have what I need.
So, now, 1, 2, 3, 4, 5, 6, 7, 8, 9, 10, 11, 12. There’s 12 little squares in your paper folds. What does that have to do with anything? Nothing, but if you folded it right, you should have 12. If you didn’t fold it the way I need you fold it, you have some other number. Okay. Two cuts are necessary right here in the middle. You’re going to cut along that folded seam up to the next fold. Turn it over to the long side. It’s on the long side. Okay. Right in the middle, come on, and we’re going to get right up there, and up to the next seam. So, our paper looks like this now. This is where you’re really going to see that envelope bit. Of course, I call it beach cabana time. But take, I like to start with the bottom right corner. You start where you want, but just fold that up. Again, trying not to get completely over any of those pre-folded seams. And there you go. Now this one for some reason, sometimes I have the tendency to want to tear right here. Okay. So, I like to keep my finger there and kind of be nice to it as I’m getting it folded. And it is perfectly okay, again, to have that little bit of white, because when I fold again, that just gives some grace, it doesn’t let it be thick and bulky. Okay, move to the next one.
We’re going to do this on both of the long sides. Of course, you can always come in with your bone folder. You might have a bone folder that looks like this one. I don’t know that any of us really have a real bone folder. In the old days, they actually did use bone. Old days, listen to me. Now you may have found a colored paper that is beautiful, and you wanted to use it and you are using it. And it may be a bit thicker. Just realize the thicker the paper, a wee bit more attention needs to be paid when you’re folding, because kind of, it’s more cantankerous the more you fold. In moment I’ll show you what I did. Okay so I now have three. What did I mean by beach cabana? Well, come on. Does that not look like it should be on the beach in Jersey? Come on, for chef, maybe, be a beach water person.
It’s going to look like an envelope any moment, which is the whole idea of the book. There we go. Okay. So, this is what you have. I think you should be with me; I’ll give you just a moment and then I’ll continue. Okay. Remember, this is what we’re going for. All we have to do now is fold these. So, we are going to take, well, you could do this. Turn it over. And do you want this to be the front? Or do you want this to be the front? I kind of like those bolded yellow streak right there. I’m going to make that be the front. So, once you decide front, it’s now going to be on your left side over here. Alright, so, we’re going to fold this top down. Watch these little corners here, these loose ones. Just kind of make sure they stay flat with this one across there. OK. Take the bottom up.
- Same over here. Cool. Got that one almost too close. See how it’s wanting to tighten. So, we just come back and flatten. We always win. Good. It’s going to up looking like this, right. Now. Take it vertical. Take this one. And you fold it over and see how it wants to. It’s okay. Just use your bone folder, use your hand, use your scissors, whatever it is you’re using. Just grab on it a little bit. Take that down, bring this one to it up and it’s recording away. There we go. Oops, go this way. Tada!
There’s your envelope book. And we’re going to go back. You’re going to get to finish and decorate tags. Hang on that. So here is where we’re going with the pages. Let me show you what I did. Now, I hope you have something sharp. It might be an awl. It might be the actual needle you’re going to sew with. It could be an ice pick if you have an ice pick. You can eyeball the center, or you can actually measure. I like to do it first on my pages that are going to be in this signature, because then I know when I go to the envelope book, I’m going to be in the right place. So, I stuck this here and I got it through to about there. Okay. So, there’s 1, 2, 3. Then since I’m going into this one, let me see the front of this one is this side. So, the signature will go in this, but let me let you have a minute to get your signature.
You already folded, cut and folded your signature earlier. So now all you need to do is be putting those holes in it. And let me show you, I have these, you can use tapestry needles. These are actually book journal needles because I’ve done some journaling. I mean actually making journals. It is so much fun, so rewarding. You can use watercolor paper; you can use mixed media paper. You can use sketching paper. You can use a hybrid of papers. I made one book for a friend that has a mix of regular, mixed media, and watercolor. Now the thicker the paper, the fewer pieces can be in your signature. But this one is ready, and I believe, let me see where I have, one, two. I have six. Okay. So, whether it’s your needle, your awl, this is craftsman. Of course.
And then you can use embroidery thread. You can use regular thread; you can use buttonhole thread. You can use a variety of types of thread. I like to use wax thread because two reasons, one it sticks to itself. And it’s really nice when you go to tie off, it’s also a little more controllable. If you want to, you can buy a stick of bee’s wax, or a little jar of bee’s wax like at Joanne’s, Hobby Lobby, and Michaels, wherever. And just use embroidery thread. This hap I have four plies here, stuck together, twirl. I can undo these and I have black, white, and nine other colors. You can get a lot of colors. You do what you want, but there’s nothing wrong with just using thread. Like when I start it with the machine, that’s just thread. So how do we know how long our thread needs to be?
Well, hopefully you’re still, maybe you finished with you punching your holes or you’re still going, you’re going to take this four times one, two, and actually on this smaller book, I bet we can do three. Because you can tell your kind of overdoing, it’d be four tight, three and a smidge, loose, whatever works for you. If you want to measure, it needs to be at least nine inches minimum. That would be three about this long going to need needle. I’m going thread the needle. And what I really like is this a few huge eyes on these things have on my reading glasses, but, and you do not, not get no knot. Another thing I like about the wax thread is sticks to the needle nicely.
So, hopefully you have the holes of your signature. Now we’re going to line this up. I’m looking at this, I’m looking at this. Make sure I have it in the center. Take this and poke a hole. Okay. So, I got it right there. We come down here and I didn’t go quite equidistant. I went about half an inch, maybe three of an inches up from the edge of the signature. Not from the hole. Don’t stick the needle through now. Everything has a hole in it. Yay. Okay. So how do we start? Well, here’s what we’re going to do. From the inside, we’re going to call this the inside. Okay. We’re going to call that desk. Going to go from the inside in the middle please. Here we go and take it till you have about two inches or maybe whatever the width of this is. Maybe not quite that much. I do too much. And on this side, we’re going to go in here, right?
And it doesn’t matter top bottom, just go to the end. The eye of this needle is a little thick, so it’s harder to pull through. Get that lined up neatly like that. Come back. Now. We’re going to skip the middle and go all the way to the end, please. Again, the area, little snug, put my finger right here. Pull that nice and snug without tearing. Okay, don’t pull so hard. Black on black might not have been the best choice for me to show you. I think you can see that. Now we’re going to go back to the center. Oh, splitting your thread, again, as I mentioned, you might be using a board and thread 2, 4, 6 pieces or strands. This is able to be split even with the wax on it. Meaning that I might get into the thread and split. See what I mean? Split between the thread.
Don’t want to do that. So, as we’re going through this hole, kind of keep this one out of your way, go into that hole look again, just so you come up and have not split that thread and then I take it off the needle. Okay, so what are we going to do to tie this? Well, some people actually take up both ends and tie a knot. Well, and that’s kind of bulky. So, here’s what I like to do, if I have short and long, which I actually do and that’s not uncommon and you could put your needle back on if you want to, again, if you don’t have wax thread, this isn’t going to work quite as well, but it will work. And you’re also welcome to knot. So, I’m going to go under once, twice, is thrice a word? The word sounds like an ought to be. Leave it and I’m going to pull it up, down. And because this is the wax thread, it’s actually going to stick to itself. It’s not going unravel and it lays flat, which I like. If you are knotting it, it’s okay. You can knot once; you can knot twice. Now what I’m doing is just lifting the thread with my needle so I can poke this under. I was too lazy to rethread it. You can go up, back, up.
I am using these today. So, I have one, we decorate in a moment if we, as we have time and we should have some time, I want to show you to make a closure. 2, 3, 4, signature! And you can use white pens, gel, or paint. You can use any kind of metallic colored pencil or metallic marker or metallic paint. It looks really pretty on the black. This one is going to be black. And what about closing this guy? Well, there are various ways to do that. So let me show you one of the easiest. The easiest might be a rubber band. We don’t want to do that. We’re on our own button, but we’ll use the big button. So, I have a can of buttons, and this is a little wooden button, you can get in kind of button. And this is just elastic that you can buy, you know, Walmart, wherever. And then I don’t cut it until I have my book the way I want it.
Let me undo this. And here’s why I don’t. If I make this on an empty book and then I make my tags double and thick and bad extras, they’re too fat, then this won’t work. So, all I do when I’m getting ready is I take the loose end of my elastic here, my loose end of elastic here and I hold that one hand, put it on the booklet, move it to the center. And if that’s, you know, if I need to make it tighter, all I have to do is pull and push the button down. If I need it looser, I can just loosen up. Let that button come up. And so, then you just tie it however snug you want it. It’s like I’ve got the purple or the blue one right here. Because I’m going to have a wonderful, I forgot I had it right here. Blended on the table. Look at this, guys, I love this button. It’s an anchor. Does that make you think of a peacoat, anyone have peacoats? Michigan people, Illinois people, come on. You wore peacoats back in the day.
So, there I had pre-measured, it’s not too long. And then you can do a double knot up here. And once you do have it, the way you like it, you can leave those long or trim them a smidge. Trim them a lot, whatever works for you. And I do like the buttons, but I did find them once upon time, and I haven’t found them since. So, I probably shouldn’t say it because now you’ll go nuts trying to find them like I am. They actually make a flat scrunchies, hang on. I forgot to get it. But now this is November, December. We’re doing accordion books. This is an accordion book with a handmade paper I made and embroidery floss and a button. But that doesn’t close it. I could bring elastic around that and let that be the closure. But I didn’t like going over this. Like I thought I might, but look, I found flat scrunchies. Aren’t they wonderful. They only have two left and they’re not going anywhere. They gave away the others. Ah, I love that tells me, oh, we’re good. We’re good. But see this according book I sketch in at the lake. So, I did that little wreath. I did that little flower because I’m at the lake. So, I thought I need to fill this up. Haven’t finished it. There’s that little dude. I like the leaves in these guys, probably because it takes two pages, but here’s our book of the day. Signature tags closure.
Now, even if you don’t have your buttons in elastic, et cetera, now worry not, you can actually use paper. If all you have is paper, it’s a good thing, now let me get different color to use. And let me cut it. Now if you have ribbon because you’re going to put ribbon on your cards. Of course, you can just use ribbon and tie it. I did that with this big accordion book. This was so much fun because this big accordion book there just went any way I was getting, it was elastic. This is 26 pages. And if you want to see what’s inside for fun, you’ve got to come back in November, December, but you can use paper. You can use paper and so, all you have to do is so take your paper, hold it over and put this on. Well, that’s embarrassing. Oh no, I did. Of course, you would glue it or tape it neatly. I think that I shall bend the seams a smidge. I’m going to put just a little eighth-inch, quarter inch allowance here. Take that across from here. That will sit much neater there. Yeah. See how that looks. That’s good. Then go to this side, do the same thing. So about there, this is kind of like a band, I guess you would call it. Yeah.
And if you had stickers, I have some really cool team DPF stickers, lights on them. So, you could glue or take that together. And then you have a band that can slide on and off to, to close your so typically when I’m decorated, now that it’s made, right, everything’s made and prepared. I have my signature in, I have my button bill. I have my button closure. I have my four tags. Now the next part can take anywhere from an hour to 10. I mean, it just depends on how much time I want to put into these. It can be as simple. I’m going to just make this super simple for fun. So, because I bring black and white, I got out my black and white pens earlier. So, I have this one, it’s a combo, and so I’ve got a plain here, this is a dual. So, I got a plain, and I got a brush, that’s really fun for clean and then I’ve got some microns here. There’s a variety of brands, but you can see the numbers. Yeah. 0 0 5 0 1 0 2 0 3 0 5 0 8. This is the first new thing. That’s the thickness of the pen. So, it would look like this, depending on what I want to write. So, there’s my oh-oh-five.
Here’s my oh-oh-one. And we’re talking minuscule differences from one. This is 20 millimeters. This is, should 25. Yep. 25 millimeters. The oh-two is 30. Isn’t it? Yep. 30, it’s a little bit bigger. So often, I use three pens like oh-oh-five, oh-two, and oh-five Just to have a mini, a thick, and a really thick. But none of these are super thick. There are tens. There are twelves. But you can see just by having a set, this is just a set. Now guys, I don’t know about you, not the coupon queen, but let me tell you, I don’t buy these things. Regular price, because they’re nuts, but you can get coupons. Michael’s often, you know, half price, 40% off their good stuff. So having these thicknesses, I can now play. So, let’s say I wanted to go ahead and use my words from earlier. So, I am going to, no, I don’t want to do that. Oh, let’s use my haiku. Where did my haiku go?
I’m going to use five. And if it’s sun and I’m doing black and white, I’m going to draw my sun, see?. I’m going go with simple childlike, not childish, childlike. And then I’m going to go with a bigger one. The thickness is going to be the next step. I will ask friends for quotations, poems, scriptures, favorite words, whatever they want to give me. And then I will make an envelope book of tags for them. So, if I was going put lovely sun, you see then my next tag. How are we doing on time? Oh we’re good. I could find some simple black and white for “green oak leaves bend with the wind.” Oh gosh, there’s no wind right now, but I can see the leaves. Well, so these are these leaves, that’s fun, going this way, and I’m going to put you, and I would be neater, and I would definitely spend more time. I’m giving you an idea. Green oak leaves bend with the wind, et cetera. So, I could do me for tags or do my three tags or my haiku. And then the forest page could be where I want them perhaps to write a poem of their own or haiku of their own on these pages. Or I could fill these pages. I’ve actually used one of these and I’ve used an accordion book to create a letter for someone and I’m screen.
And you guys can unmute or ask questions. Tell me what else would be of concern on making an on book with signature and then I’ll preview next week. How’s everybody doing? What’s our chat. What do we get?
Angelina Arrington:
No questions in the chat yet, Lorraine, but you’re doing on time. Yay. Yes. We’re going to let folks gear up and if you all have any questions, please do drop them in the chat. We’re anxious to hear from you.
Lorraine Wilson:
I see Royal Oak, Michigan too. When I was in high school in Clauson, I had to walk to Royal Oak to the newspaper to deliver the high school article every Friday. okay. Mindful drawing preview. That’s what we get to do in September. And you know, for those of you with kiddos or grand kiddos in school, you might be going, ah, Alabama already started school Monday of this week. I was shocked, crazy kiddos, but mindful drawing is some of these very small things that we’ll do for warmup. And its very simple lines and circles, cetera, Zentangle might look complicated, but it’s just a series of patterns and you can do a group like that. You can do a fun one like that. Or my favorite thing is what is called Zia, Zentangle inspired art. And I like to do things like this, and it looks so gorgeous. Like I must be really fantastic people. It’s just pattern after pattern after pattern. It really is that simple. So, we’re going to do some mindful drawing, which is a combination of slow drawing and Zentangle, and that’s what’s on the agenda for September. And we have five minutes. If you have any questions or I’ll give you five minutes, chat have anything yet? No. Jean enjoyed it. Thank you, Ms. Jean Shannon. You’re welcome. Paulie! Yes. You may record my lap, Paul. I’ll call you and talk to you.
Oh, I’ll have to write a haiku about the Dolomites. Because I’m already working on your picture with you on the bike right here in those mountains. Oh my, it’s wonderful. Thank you. Thank you. Thank you for being here, folks. Small group, so much fun. Angelina, what do you think? Shall we call it?
Angelina Arrington:
We can. I just want to make sure we leave space for folks if they have any questions or comments, but seeing done Lorraine, I want to thank you so much. This was my first joy break and I actually feel very joy filled, I’m with Polly. Can we have that laugh recorded so I can take it with me every day? I love it.
Lorraine Wilson:
You guys are sweet.
Angelina Arrington:
We’re grateful to have this opportunity to share the joy breaks with you and with our community and everyone who joined us. Thank you so much for being here today and remember that we will send the recordings out in about a week and in September, as a reminder, as Lorraine shared with us, we’ll be doing mindful drawing during our joy break. I hope everyone has a wonderful rest of your week. Take care and bye everyone.
Lorraine Wilson:
Bye.
Show notes
We had a great time at this month’s Joy Break learning how to make envelope books. Here are some takeaways:
- Using tools is a great way to 1) work with your Parkinson’s symptoms and still do art and 2) give yourself shortcuts in creating your work. Lorraine showed us a lot of tools today, such as hole-punchers, paper cutters, and more.
- One of the ways that we can make our art more personal is by using these different tools or our different abilities and showcasing them in our work. For example, if scissors aren’t working, tear the paper with your hands. It makes for antique-looking edges while still keeping with the general construct of the design.
- Make your own joy break jar! Write down things that you like to do and put them in a jar. At least once a day, pick out a piece of paper and do that activity! It’s a great way for you to take a break and do something you love. We did haiku’s for our mini-joy-break-within-a-joy-break.
- Close enough is good enough. For recovering perfectionists, sometimes imperfect is better! Give yourself that grace and acknowledge how great your art looks, imperfections and all.
- Don’t let others’ opinions effect how you feel about your art. Sometimes, we have a bit more tools or tricks than others. That’s okay. As long as you’re having fun and making something you’re happy with, that’s enough.
We hope you had a great time learning from Lorraine. We look forward to seeing you next time!
mentioned materials
related resources
[Webinar Recording] Envelope Book with Tags: A Joy Break with Lorraine
[Webinar Recording] Lettering and Doodling: A Joy Break with Lorraine
about Lorraine
 Lorraine Wilson, a Davis Phinney Foundation Ambassador, was diagnosed with Parkinson’s in early 2017. Just a few months later, she assembled a multi-disciplinary team of colleagues at the university where she was teaching, and her personal and professional journeys joined forces. They began an exercise study with a fresh look at resistance training with instability and cadence walking. That was followed by a study of blood flow restriction used during resistance training. Lorraine helps facilitate the local support group. She knows that the support from family, friends, and others with Parkinson’s is critical to living well each day. Maintaining a positive outlook may not be easy, but it is a worthwhile effort that lends support to others, making life that much better. One of her favorite quotations is from Ralph Waldo Emerson, “Scatter joy!” She strives to do this in as many ways as possible every day. You can find some of Lorraine’s other work here.